DIY Asphalt Repair: A Step-by-Step Guide
Key Takeaways
- Choose the right tools and materials for your asphalt repair.
- Follow a step-by-step approach to ensure proper application and results.
- Regular maintenance can prolong the life of your asphalt surfaces.
If you’ve noticed cracks or imperfections in your asphalt driveway or parking lot, don’t worry! This guide will walk you through the steps of performing small-scale asphalt repairs as a DIY project. With the right tools and materials, you can restore your asphalt surface to its former glory.
Tools and Materials Needed for Asphalt Repair
| Tool/Material | Description | Purpose |
|---|---|---|
| Asphalt Patch | A high-quality patching compound. | Used to fill cracks and holes. |
| Trowel | A hand tool for spreading material. | For applying the asphalt patch evenly. |
| Crack Filler | Liquid compound for filling small cracks. | Prepares the surface before patching. |
| Sealant | A protective coating for asphalt. | Seals and protects the surface. |
| Magic Crack Filler | A granulated formula for easy application. | Fills various sizes of cracks. |
Step-by-Step Guide to DIY Asphalt Repair
Step 1: Assess the Damage
Before starting repairs, carefully inspect the asphalt surface for cracks, holes, and any other damage. Take note of the size and depth of the issues as these will determine the materials needed.
Step 2: Clean the Area
Remove any loose debris, dirt, or vegetation around the damaged spot. A wire brush or pressure washer can help clean out the cracks effectively.
Step 3: Apply Crack Filler
Using the Magic Crack Filler, fill in the cracks by following these steps:
- Dampen the area with water.
- Sprinkle the granulated filler over the cracks.
- Follow with slight compaction to ensure it settles in.
For more information on how to use this product effectively, visit our guide on Magic Crack Filler.
Step 4: Fill Larger Cracks and Holes
For larger areas, such as holes or significant cracking, use a patching compound:
- Fill the hole with asphalt patch, mounding it slightly above the surrounding surface.
- Use a trowel to smooth it out.
- Allow it to dry as recommended on the product label.
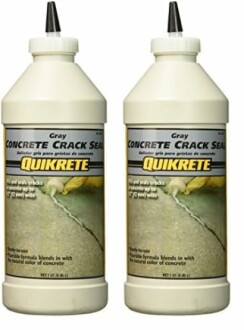
Quikrete Concrete Crack Seal Natural 1 Qt (Pack of 2)
This durable product is easy to use and perfect for sealing cracks in asphalt. Its reliability makes it a great choice for your repair projects.
Learn MoreStep 5: Seal the Surface
After all patches have fully cured, applying a sealant to protect your asphalt is highly recommended. This will help prolong the life of the surface and enhance its appearance.
Step 6: Regular Maintenance
To ensure your asphalt stays in top shape, conduct regular inspections and maintenance, including:
- Cleansing your asphalt surface.
- Promptly addressing new cracks and damages.
- Applying sealant every few years.
Conclusion
With the right tools and steps, performing asphalt repairs at home can be a straightforward task. By following this step-by-step guide, you’ll be able to keep your asphalt surfaces looking great for years to come.
Tips for Successful Asphalt Repair
- Work during dry weather for the best results.
- Make sure to check product directions for best practices.
- Use enough filler or patch to account for shrinkage as it cures.


